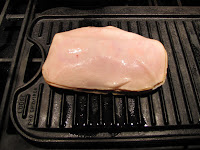
These relatively cheap sandwiches were made with simple enough ingredients:
- Bread
- Turkey
- Beefsteak Tomatoes
- Mozzarella
- Avocado
Now, with the bread and the mozz, I went a little fancy and bought fresh. If you're on a tighter budget, buy accordingly. And don't feel limited to mozz. Any type of cheese that melts easily, like muenster or cheddar or, please no, pre-sliced American singles, or whatever they are. Don't feel limited to turkey, either. It just so happens that I don't eat red meat. Any deli meat, thinly sliced. Any. On top of that, feel free to replace or leave out the tomato or avocado. But at that point you're stuck with a somewhat...dull... sandwich. Which is okay. I guess.
Anyway, the assembly of the sandwich is almost as straightforward as the ingredient list, except for maybe the 'panini' part. If you don't have a panini press, go the old school sauté pan route. Or, if you don't have a sauté pan, skip the whole warm-melty-ooey-gooey part of this sandwich. Assemble cold, like a man.
With the stove, keep the heat on low until the sandwich is assembled, then turn it up depending on how dark and crunchy you like the bread. This way the cheese gets to melt, but the bread doesn't carbonize right off the bat. And make sure you're pan or griddle is hot by flicking a little water on it. If the water sizzles, you're ready to get your sandwich on.
Drizzle a little olive oil or spread some butta' on da' bread if you're going the panini/sauté pan route. It'll give the bread better marks and some crunch, to break up the textural monotony or relatively smooth ingredients.
- With the oiled or butta'd side down, slap some cheese on that sucker.
- Hit the bread with the turkey or preferred deli meat next, one or two slices, nothing to heavy.
- Tomato and avocado, in any pattern you please.
- More. Meat.
- Your second slice of bread, also oiled or butta'd, this side up. And then flip that sandwich and get some more marks. More marks, more texture. Yes, please.
 |
| Step 1 (Photo by J.Cust) |
 |
| Step 2 (Photo by J.Cust) |
 |
| Step 3 (Photo by J.Cust) |
 |
| Step 4 (Photo by J.Cust) |
 |
| Look at my marks. Look. At. Them. (Photo by J.Cust) |
This looks delicious, I enjoy all your posts. If you have the time you should do more show and tell like this. Personal pictures of things you make and the process of making it is always interesting and fun to read. I wouldn't be upset if you made us food in class one day!
ReplyDelete